Ghost on the BlockChain while you do your trades.
Let’s start our concept story like this. You are a Cryptocurrency investor and You have spent time and money creating an online presence trading Cryptocurrencies and from Jan 1 2018 you have been informed that you will be monitored, it could be from any person, thing, entity but any transaction you make from this point on will have a digital fingerprint.
To Ghost on the blockchain is means to create a new identity in all forms of crypto currency and to abide by Ghosting rules. The Blockchain is not anonymous anymore, never was, but nobody envisioned a tracing of addresses so now we are presented with a problem. There are global government entities that now as of Jan 1st would like you to account for all of your transactions for Tax or usage fees payable to a government.
This was going to happen. There are ways around this. If we simply fall off the Blockchain and go Ghost we can avoid some of these issues until it is time to cash out. We can now globally cash out meaning that we do not have to rely on our own country to withdraw Cryptocurrencies.
Please note: As always, this is a quickly written and hopefully detailed. I am a Hacker and my skills are Hacking not writing so I wrote this up quickly and you will see grammar and spelling errors and TMI, ignore them. I am trying to break past being such a quiet person and hopefully provide my knowledge to those who seek it without repercussion so if you don’t like the way it is written just move on. Every new post is therapy for me and I learn something new in writing so this is two fold for both of us.
You get a text from a friend that reads:
I know some things that you don’t know, as I sit here and write this out I am in a building located in Washington, DC sitting somewhere between the Treasury, Federal Reserve and the State Department. I see what is coming and I want you to know that I have a plan. Well it might not be full proof but it will be just what you need for the next few years. Look for my email -M
HIs plan is divided into two parts.
Your friend has a plan, he shoots you a ProtonMail message with the following instructions:
- The first part is getting to the point of going Ghost and we will need to follow certain steps to make it to Ghost like behavior, you will have to pay fees and you will have to sell what you have but of course you will buy them back under a new Ghost persona.
- The second part is just a normal route on how to buy sell and trade. How to store your winnings safely and then how to deduct them.
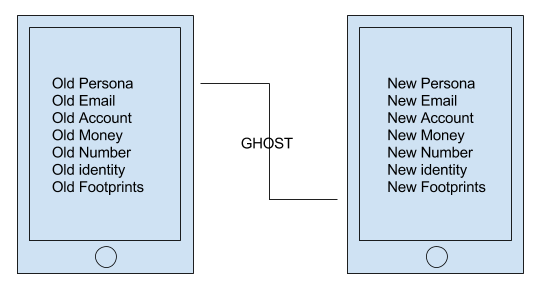
So the concept your friend is trying to present to you is the equivalent to halting your current Cryptocurrency trading life and creating a new one… but he mentions must be done in specific steps.
The steps are anonymity topped on top of anonymity. Once the accounts and devices needed for your anonymity are in order the actual daily process is very minimal. It would take no longer to sign in and make a trade and in some ways the Ghost processes will give you more options.
To achieve this we will need specific hardware and you will need to create new accounts but once this is complete you will be back to your good old trading self and you should not have any more issues.
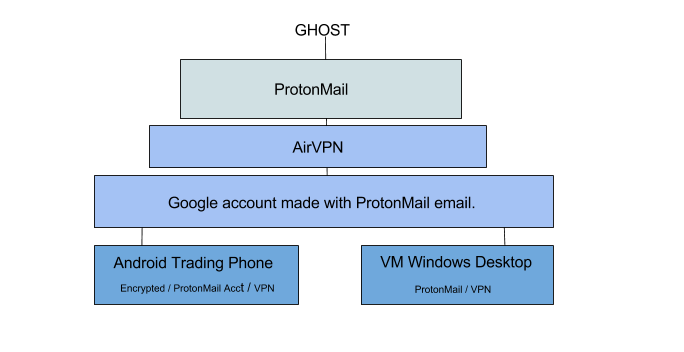
ProtonMail
So why ProtonMail, created by CERN scientist as the need for privacy arose during leaks of their research. ProtonMail is based in Sweden and is exempt from government spying. As far as the email platform ProtonMail is heavily encrypted, you have to make two passwords one to get into your account and one to decrypt the encryption on all of your files.
You will need to use ProtonMail as your main and first email account, With the encryption you can even use your ProtonMail account as a text safe place, account info backup. Think of ProtonMail as a place to store extremely important txt files and usernames and passwords… normally this would never be suggested but ProtonMail offers additional encryption. Get the free account for now. We will then go to Google and set up a version of a Google account without a Gmail so that we can use that account with our Android trading phone, Google Apps and Google Voice.
VPN
VPN can be paid for in Bitcoin to further remain anonymous, sign up anonymously using your ProtonMail account and pay for service using bitcoin. – Use Airvpn on phone, tablet and computer during Crypto transactions. Using the vpn you can still perform transactions from home, office or Starbucks.
AirVpn is located in France, does not keep records and is used by hackers and political activist around the globe. AirVpn is highly regarded as safe on privacy. AirVpn has unique features that other VPNs do not have like the ability to use Tor to VPN as a tunnel and vice versa…. VPN to Tor (They run their own Tor node) of course you will need to know about VPNs to do the more advance features but they are a favorite VPN among hackers. You can read about AirVpn and Tor here.
Let’s talk more about why AirVpn is the choice. You can run 5 devices, computers at the same time so it is like getting 5 VPN accounts for the price of one. You can run it on your phone while also simultaneously run it on your server. You can use the AirVpn “Eddie” software to dial in automatically on your computer and the Eddie software has “Network Lock” this is a feature that kind of seals the computer you are running the VPN on so that all communication MUST go through the VPN, so there is no leakage of data and must tunnel all packets to AirVpn.
We will put Airvpn on your Android phone and on a Windows 10 VM which will be your trading platform.
Google Account
Yeah we will need a google account, preferably one without email as you should never link it together if you want full anonymity. You can use free sms sites for email phone verification. Follow this link to sign up for a Google account without Gmail
Trading Phone
The phone is important. You are buying a second phone but you should under no circumstances EVER put it on the cell network or on a wireless provider while you use it as a trade phone. The phone will be extremely basic, only apps that you use for Trading will be placed on the phone, no social media, no Facebook no twitter. I will show you how to encrypt the phone and you will set a pattern lock not a pin. This phone will accompany you and be your second phone, you will carry two phones, your personal and this trade phone.
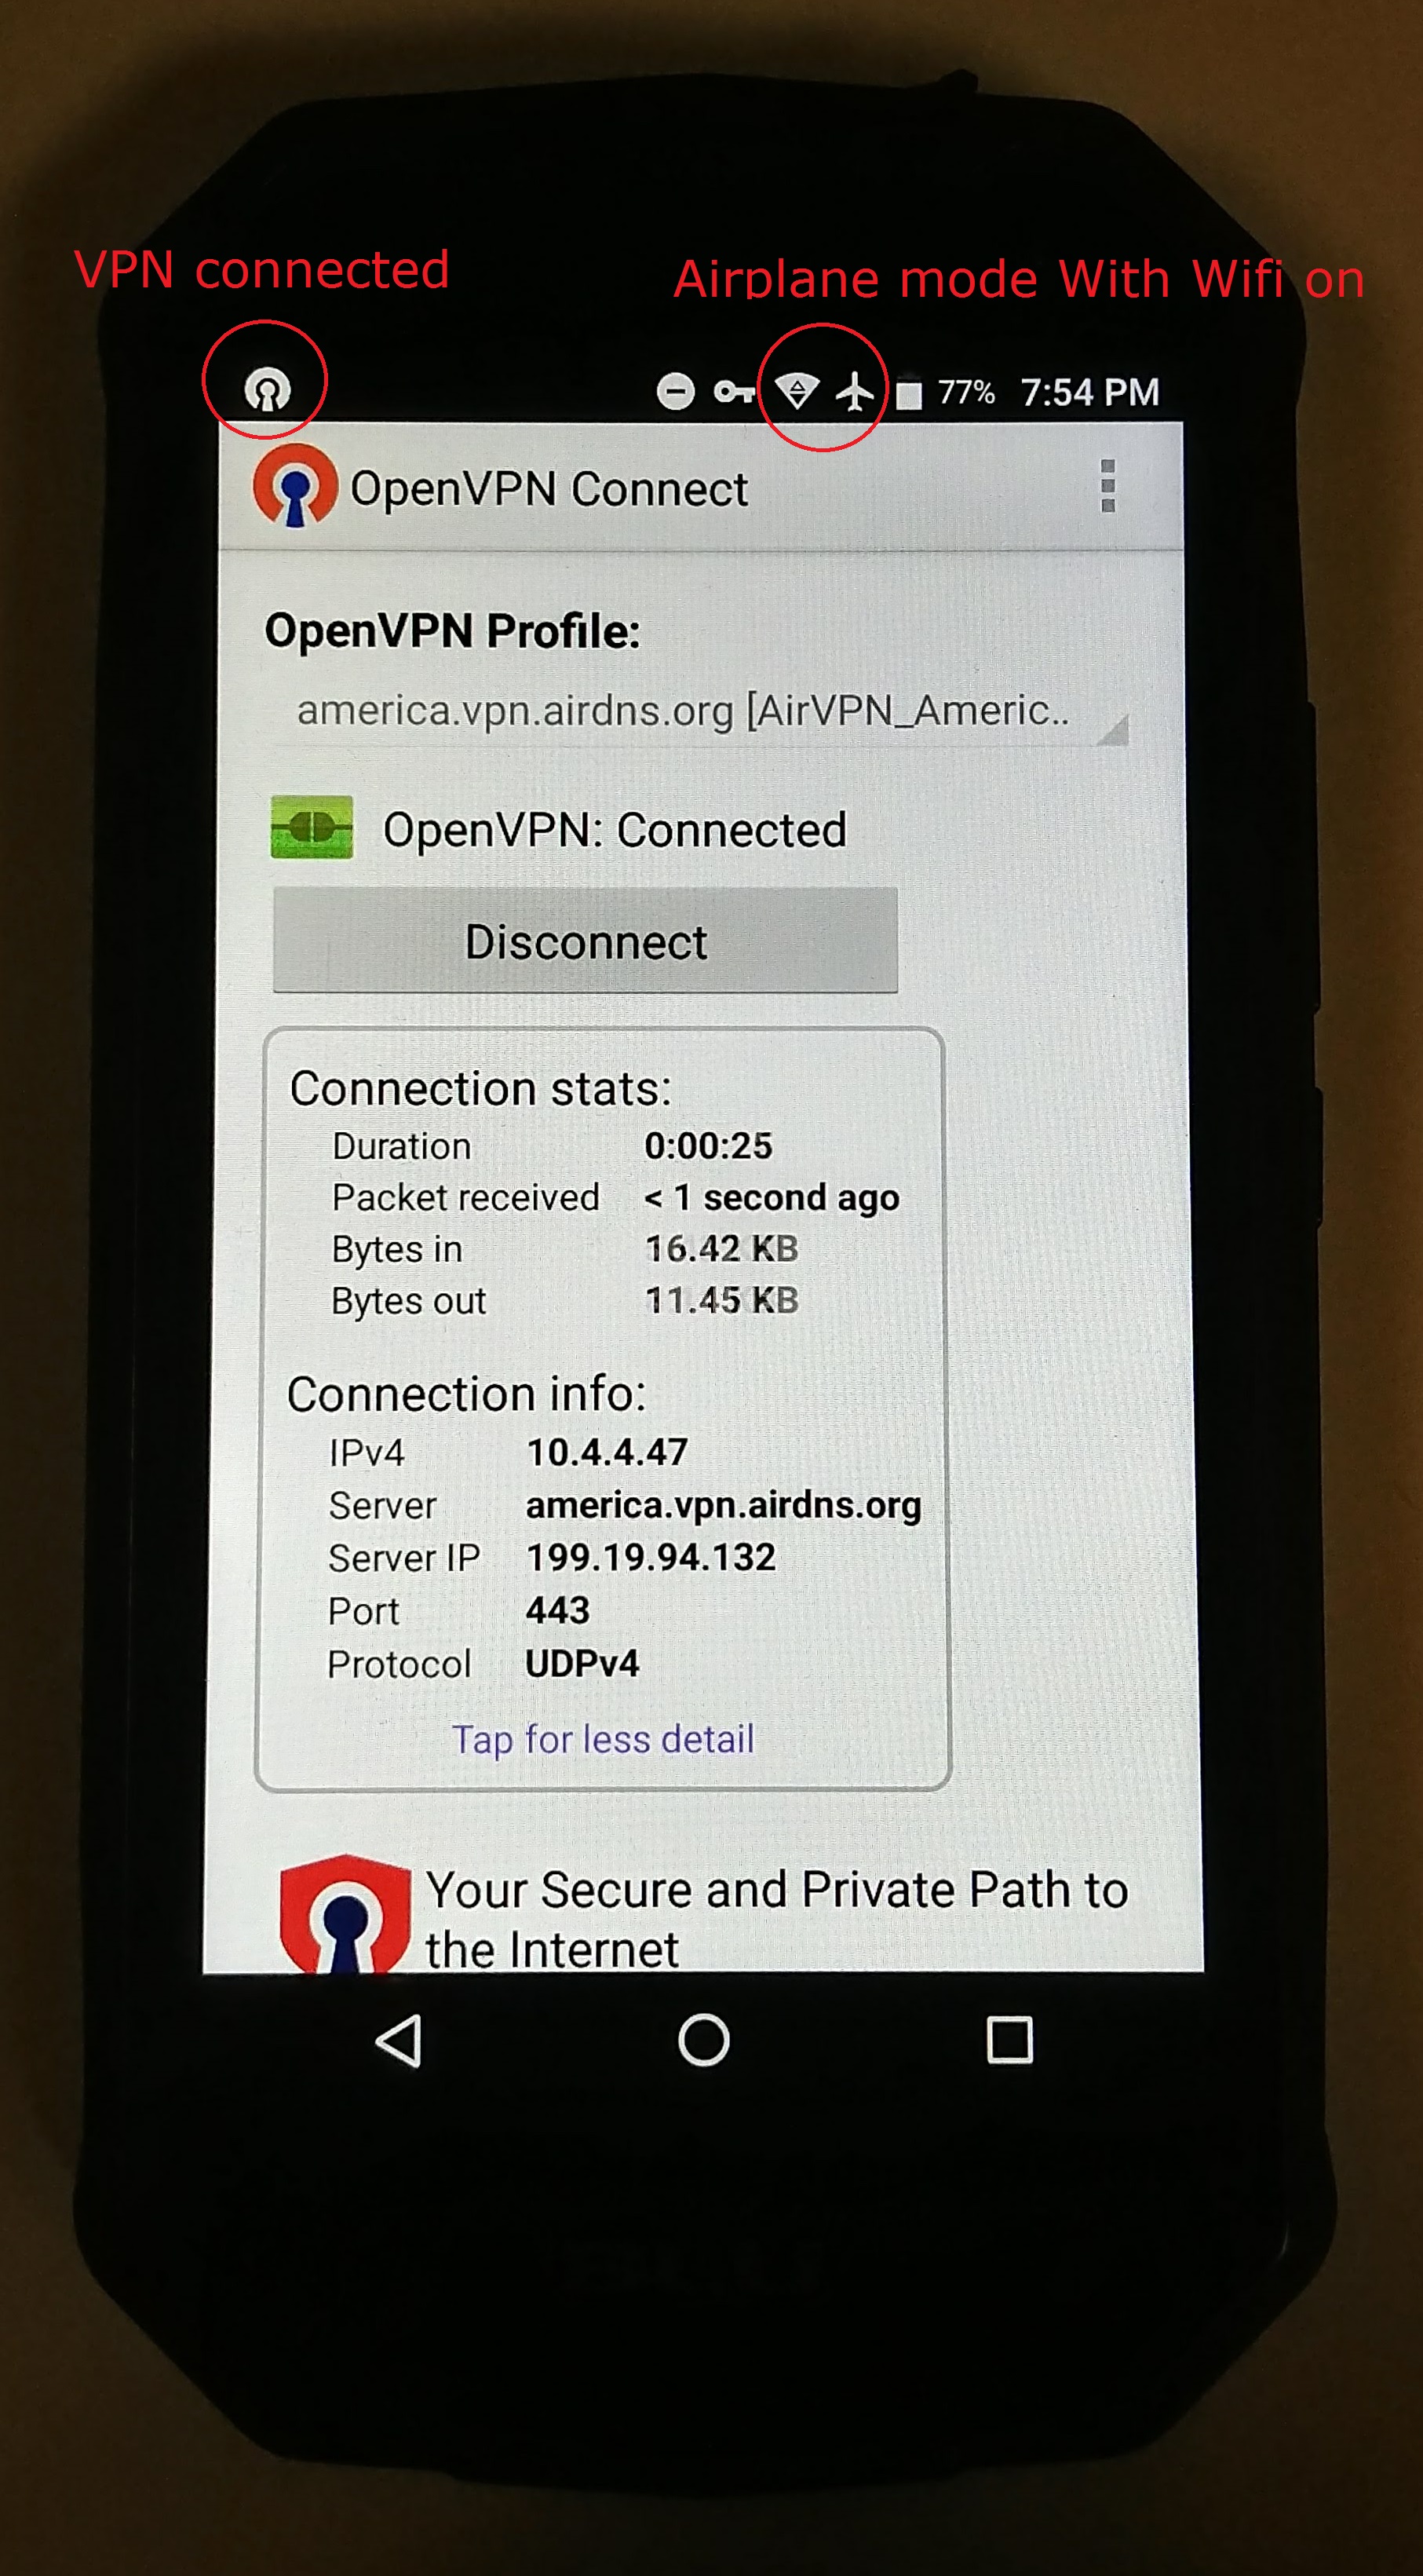
You can buy a spare Android phone and pay for it with Bitcoin, Overstock will accept Bitcoin and even has a decent selection of Android phones. We will never activate or place the phone on a cellular service, we will just use the WiFi feature while putting the phone in Airplane mode.
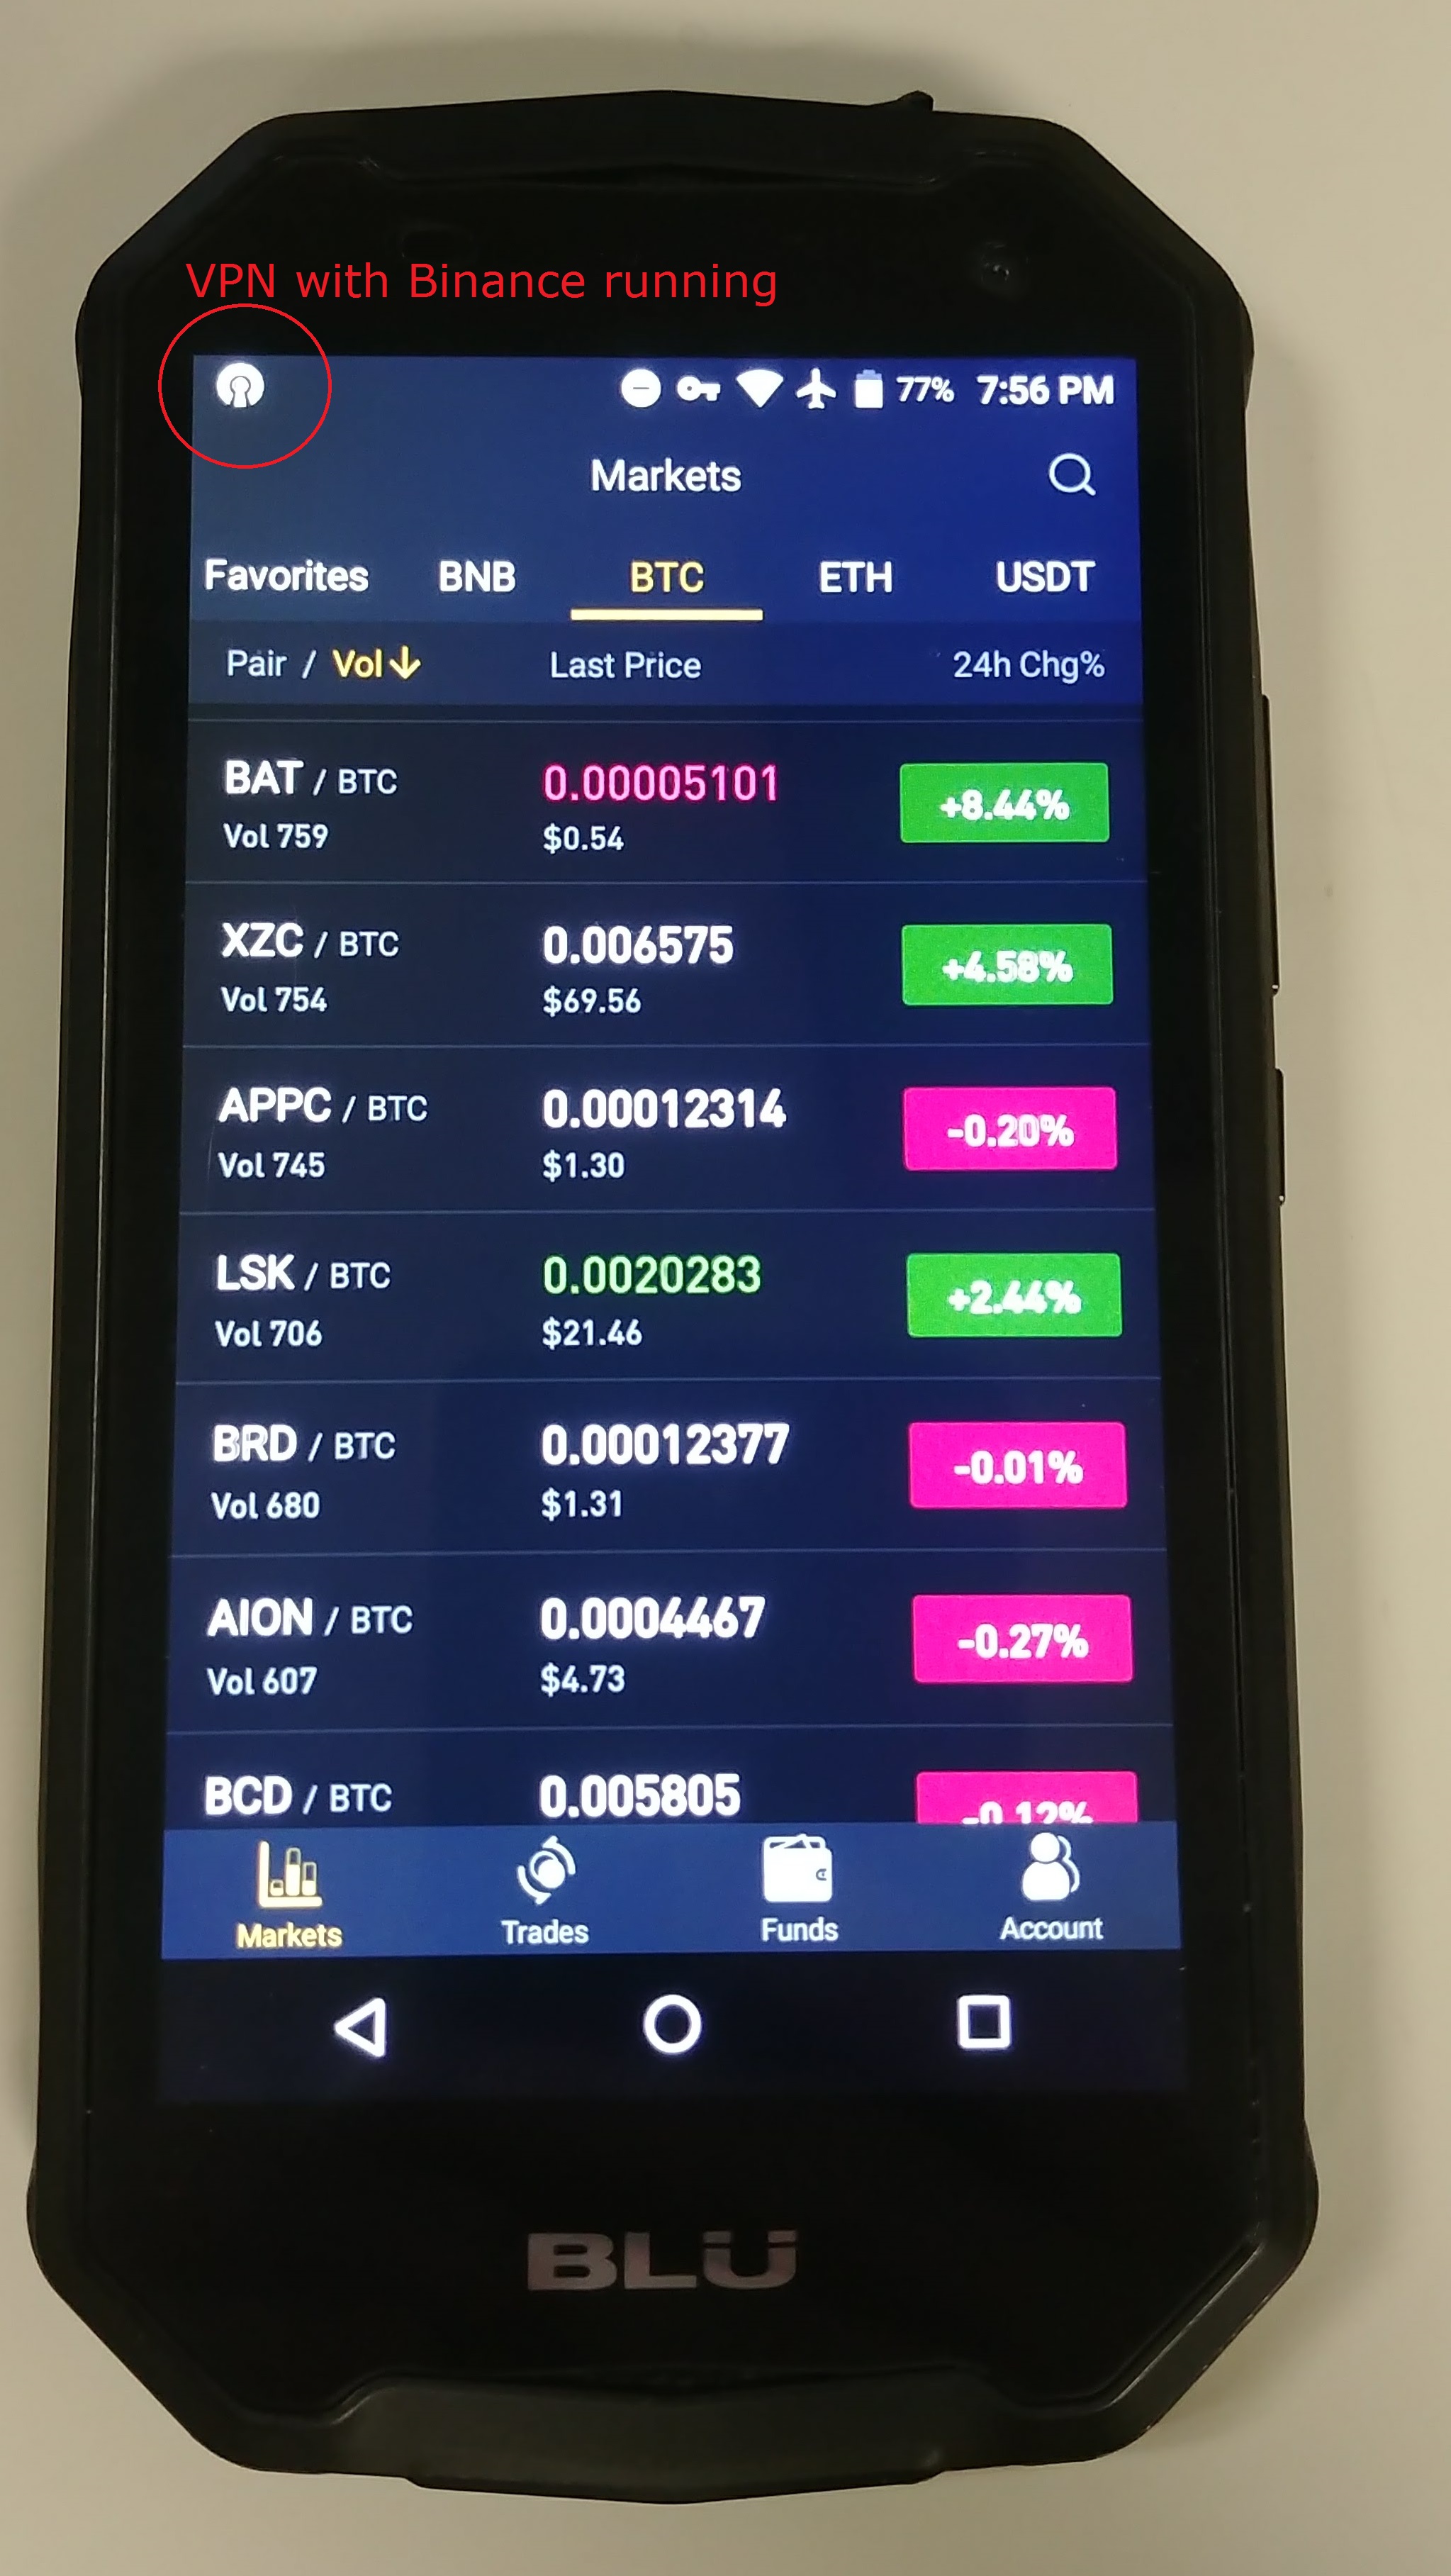
Lets get in depth on the trading phone.
M’s trading phone was purchased off Overstock and paid for in Bitcoin. You do not have to buy this phone. The phone is OK, not the best, its only use is for Trading Crypto and was bought with Crypto. The phone M bought was a BLU Tank Xtreme 5.0 and was on sale for $60 with free shipping. Would he recommend this? Not sure.. anyway, It was purchased due to it being cheap and rugged, waterproof and the 3000mAh battery. The screen is easily scratched or scuffed but it is not a bad phone for doing what is needed.
First was to scan the phone for bloatware and then remove all miscellaneous apps. From the bottom tray the phone and text app was removed and replaced by the VPN client and Google authentication apps.
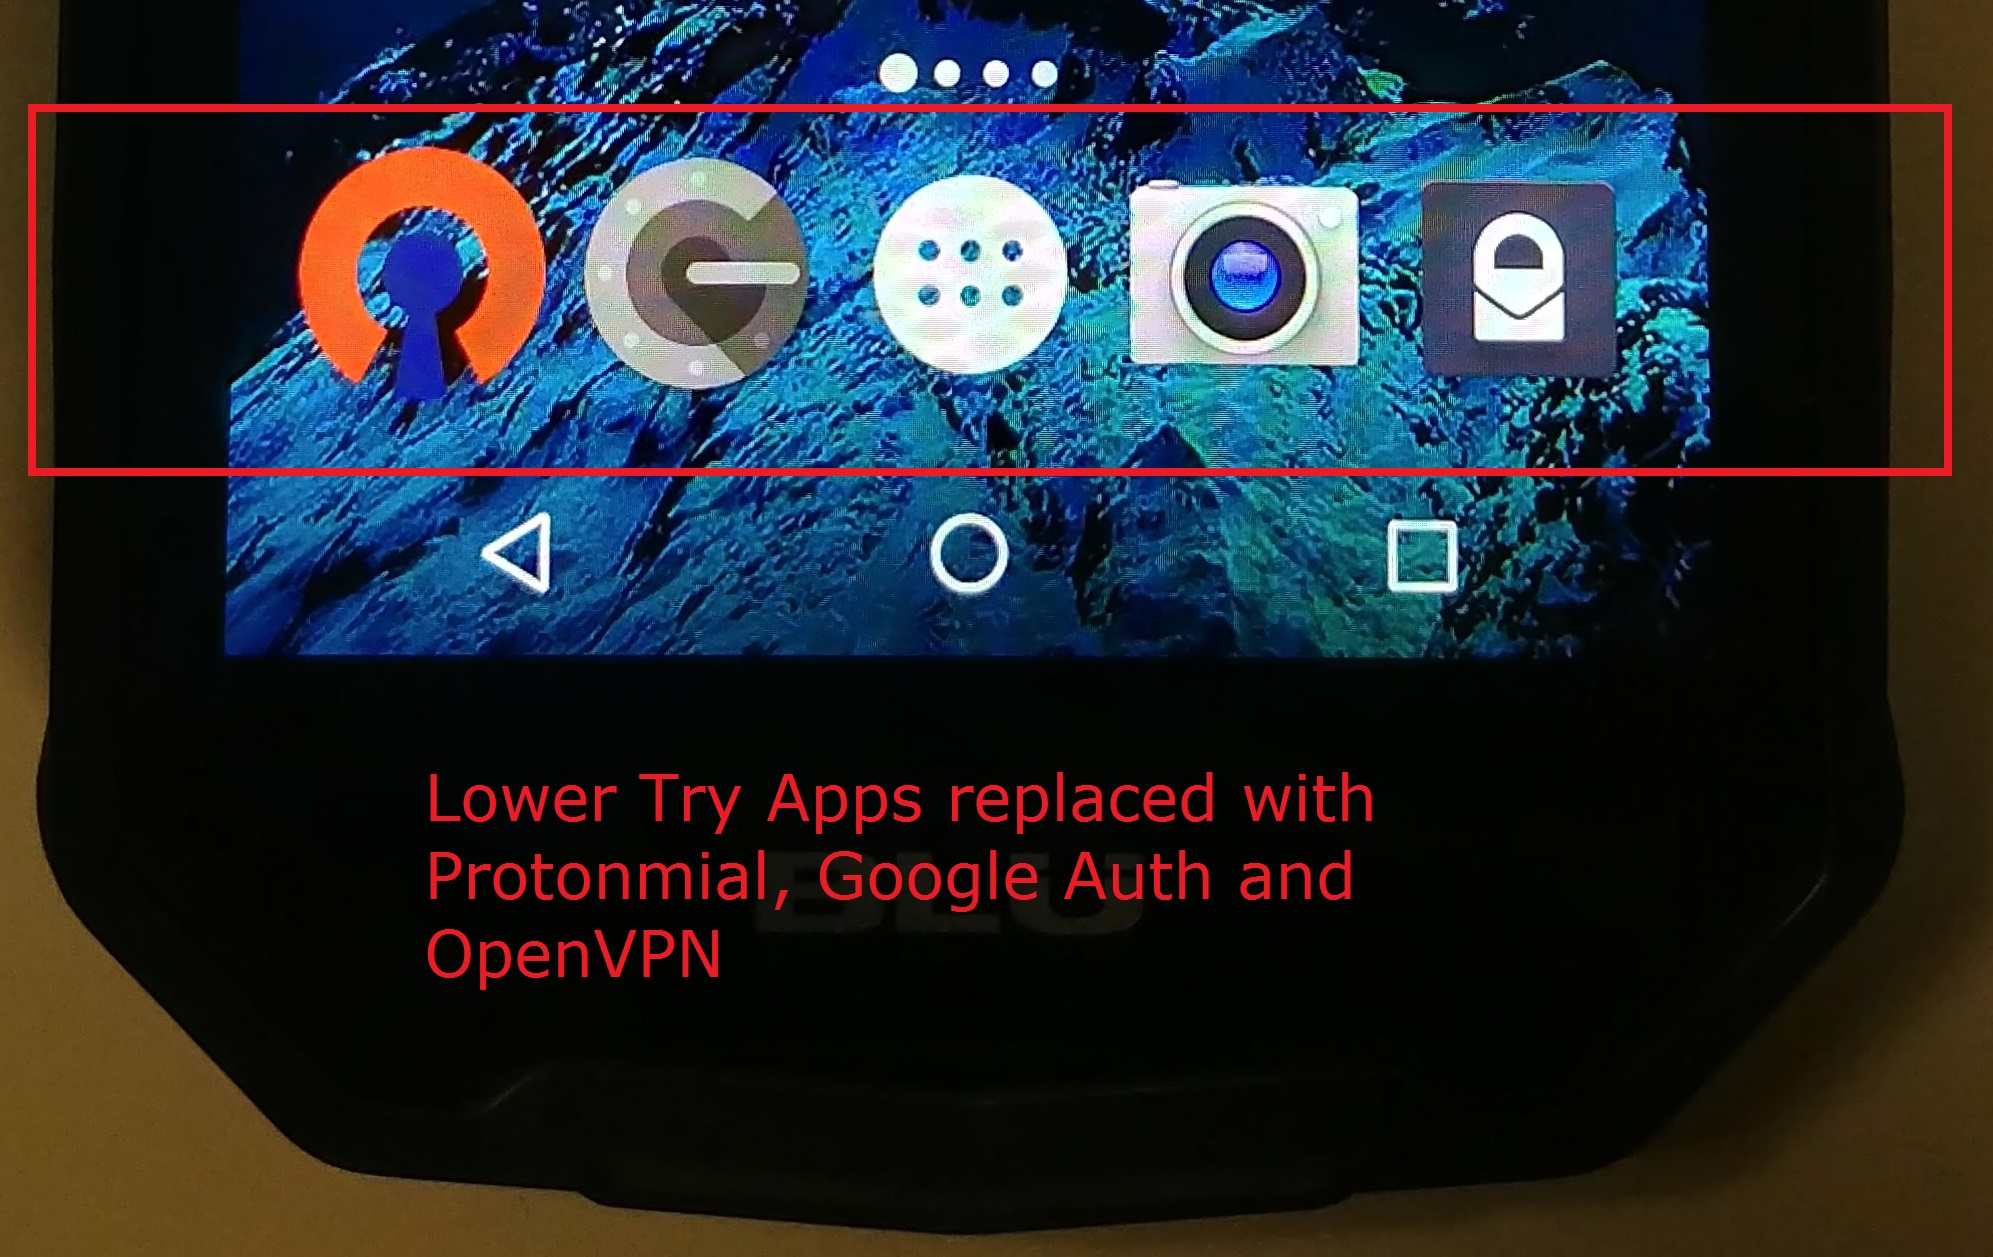
Second was to encrypt the phone. You might see a slight performance reduction but nothing that will case headaches. Once your phone is encrypted if it was ever taken away from anyone you could simply choose not to unlock it and unless they could some how decrypt the phone, nobody would ever know what was on the phone.
Apps to add:
Ledger Authenticator (Ledger wallet)
You can place the phone in Airplane mode while being able to use the WiFi. So turn on Airplane mode and then turn on WiFi. Now when you go to Work, Starbucks and home all you have to do is start the OpenVpn client first and then after connection you can open your Binance App anywhere and make trades on the fly.
VM Windows Desktop
So we will also run a Virtual Machine using VMware. We will use Windows 10 non activated version. Set it up as a local account not linked to a online web account. We will sign into our new trading account that we made with our Protonmail email.
The only programs we will need on the VM for now is Biniance and Eddie and a browser. You can add your trading websites later. It would be great to set up Home RealVNC on your main computer so you can VNC/RDP to it at anytime.
Home RealVNC will give you 5 free connections and you have to dig around the site to find it but it is free. Home Real VNC setup.
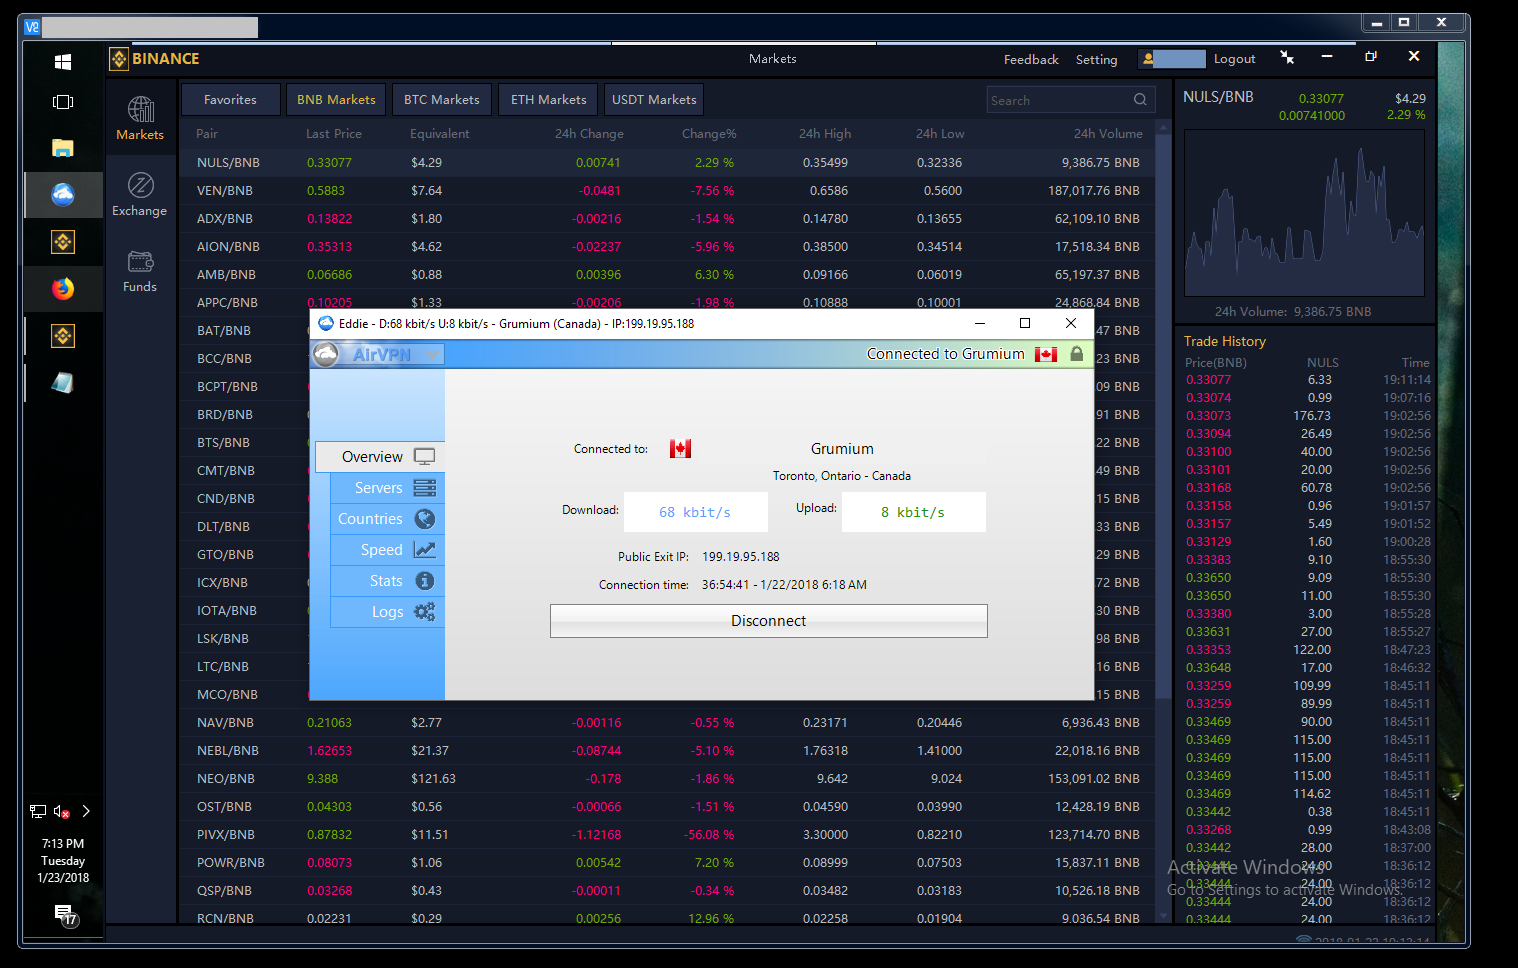
The Bininace client can be only run on windows at this time and it is similar to the web interface without the downtime of the website interface. You can get it here. Once Eddie is running it will be fully tunneled into the AirVPN and you can choose which county you would like to run the Bininace app in, in the example below we are using Canada, we also use the same VPN location (Canada) on the phone to match the app and client.
With our VM running we will only have access to the main computer running the VM and not the VM container as the VPN would prevent us from making VNC connections as it would be considered a leak. So we run the VM in full mode on our main computer and log into our main computer. The cool thing about running our trade platform in this VM is that we can access it from anywhere on any computer – cross platform. We can log into our VM trading platform from any type of computer Linux,Mac, Windows and from any location in the world.
You could even take this further, if you set up a Bulletproof Hosting VPS (Virtual Private Server) you could migrate your trading VM to a Bulletproof VPS. A VPS is similar to a web host but instead of websites it is just a remote server for running applications, bots, web scrapers. You can find some that companies that sell VPS services outside of the country and accept Bitcoin anonymously and run your trading VM on it. Additionally even on a Bullitproof VPS you can run your AirVpn for additional security.
Ledger Wallet
The Ledger wallet is an amazing little piece of hardware. Let me explain why, The Ledger has a chip in it and once you first set up the Wallet the software checks the chip on the fob to see if there has been any corruption during transport. It can be considered hack proof. The Ledger wallet handles all of your private keys and to perform any transaction using the Ledger you have to press a key on the Ledger Fob, this means you have to be holding the Ledger fob in hand to make transactions.
Another cool aspect of the Ledger wallet is you actually don’t need it once set up, what i mean is once the Ledger wallet is set up properly and you have the 24 keywords and your pin. You can use any other new ledger wallet to transfer your crypto to it simply by setting up a fob with the same 24 seed keywords and your original pin. Traveling internationally you can take the Ledger wallet or leave it and get a new one at your new destination (as long as you have the seed words and pin). You can literally carry millions of dollars on this small device.
If you are a book reader you can find a book and Highlight your seed words, number them, and take the book outside the country… reconfigure the ledger with the words from within your book…spy style.
Additionally, The ledger wallet is not tied to you in any way, there is no connection to the wallet to your name, email or phone number. It is anonymous hardware and as you create the seed words that is the only identity.
Also, for every Cryptocurrency the wallet gets one main secret address and every transaction to the fob will always get a fresh new wallet address. So one main wallet address masked by new fresh addresses to further make it harder to trace transactions. You can save and use all new fresh addresses to even further make yourself anonymous, they are not one time use.
Recap.
At this point your hardware should be set up. You should have the Crypto Trading phone running VPN with your new android account. You you should have your VM trading platform which you can access from anywhere in the world. You should have your new Crypto trading platforms set up under your new ProtonMail account.
Move The Crypto.
All that is left is moving your finances and in this case you will most likely have to sell out. The timing on moving finances is important, we will be liquidating all Crypto for one coin and then transferring that coin to your Crypto Trading phone and then re uploading the coin into your trading accounts, yes fees are involved again. You should choose a privacy coin and one that can make your transactions secret. This is the final step but again you can lose money if you do this wrong so you have to take time and watch the market for fluctuation at this point.
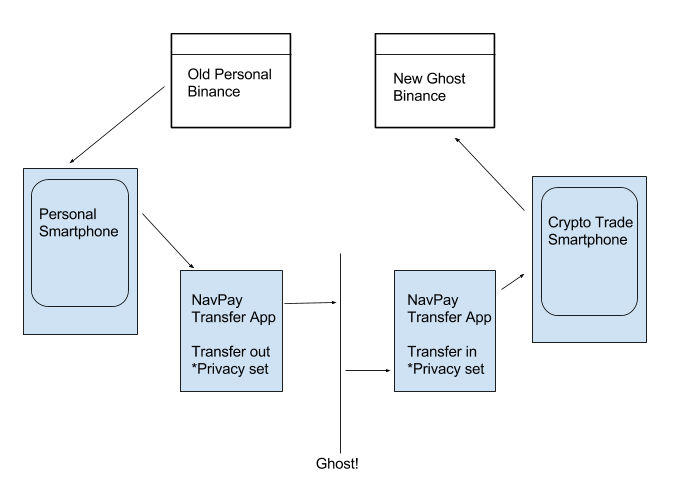
From your current trading platform (before ghost) you can transfer your privacy coin to a privacy coin app on your personal smartphone. This is where the crypto trail will end from your current personal persona to your new untraceable one.You will have the same app installed on your Crypto trading phone and move the Crypto between the two phones. When you trade between Privacy wallets under the privacy trade setting it will transfer all coins undetectable and untraceable. You can use the Nav coin and NavPay app to do this. Navpay has a feature where all nav coins transferred can be private and untraceable so you can simply move Nav coins to Nav wallets and halt the fingerprinting of your transactions.
You can use any privacy coin here but the concept is using the privacy coin to liquidate your account and then refill it with equity, from that point you can repurchase all coins you had for trading. You will have to time the market right and you will need to dedicate a day or night to make sure you move the process without any issues. You are essentially selling converting and rebuying. The privacy coin is just the middle man.
What about my Ledger wallet?
So your probably wondering cant I just transfer my Bitcoin to my ledger wallet and be secure? Why do i need to transfer to a privacy coin first?
Bitcoin and almost every other coin at this point is traceable. If you move your bitcoin to a wallet before going ghost you may inadvertently use the same wallet address or the same hardware fob on a device that is connected to your real world persona. If you plug in your Ledger wallet on your home PC or personal phone even just once how do you know there is not an app or malware that can read the wallet address tied to it then it is tied to you, paranoid? yes that is the point of going ghost, thinking ahead. BTW if there was a hacker trying to steal bitcoin this is exactly what I would do I would exploit a phone app or malware to read your private key. The thing you have to understand is all hardware has some sort of identifying address, that is how BIOS and low level applications can talk to it.
Ledger does not keep your address attached to your fob but if you attach your fob to your personal computer or phone without the proper steps who is to say someone in the future cannot read, trace or find who has that device? Ledger is amazing about privacy and you should also be amazing too.
So how is Bitcoin traceable? Governments, Individuals, Hackers and Organized criminals have ways to detect and trace all Bitcoin transactions. There are traders whom track Bloackchain wallets just to predict uprising in coin trades.The less of this information they can gather the less you will be a target.
Use your Ledger wallet after you go ghost to store all your Crypto offline. If you ever have to cash out quickly in an emergency you can just connect it to any computer and transfer it out, worst case scenario… The ledger does not rely on being ghost but you should try hard to use it ghost first. Move all your winning to your Ledger. Store your ledger in a fireproof safe or safety deposit box. All you need is the incoming wallet address (just use one of the previously issued incoming wallet addresses.) just transfer coins to that, you really only have to hook it up when you transfer out. The fob can stay in a safe while you add coins to it using one of the public keys it issues to you. Keep that public key in your ProtoMail account for easy access.
So I apologize I wrote this like a brain dump, free hand, very quickly. I plan on coming back in the next few days and cleaning it up. Please come back for a proper post but until then you can get the idea of what M is trying to tell you.
Updating, More to come….


